Internet Information Services log files are useful for examining and tracking problems that may occur in your web applications. These logs are usually located in C:\Inetpub\Logs\Logfiles. The concern is that these logs quickly become very large. In companies, it is not uncommon to find C:\ partitions saturated with logs and on the verge of a system crash. How do you purge IIS logs? Is it safe to delete them manually? Can they be purged automatically? We will see that several methods are possible. One is not necessarily better than the other, everything depends on the situation and the constraints of the company. Here is a non-exhaustive list:
- Manual deletion
- Creating a scheduled task
- Creating a configuration baseline
- Purging by a third party tool (IIS Log Cleaner Tool)
How to purge IIS logs
Manual deletion: managing the emergency
Manual deletion of logs is generally done in critical cases, when your server’s C:³ partition is about to saturate or it has just crashed for example. This is not a long term solution but it allows you to troubleshoot in the short term.
To do this, go to C:\inetpub\logs\LogFiles\W3SVC1. This is usually where you will find the most logs. Select anything older than a week (more or less depending on your needs) and delete it. With your disk breathing again, you can now think about a more permanent solution.

Creating a scheduled task
Creating a scheduled task is a simple solution to set up. This task will be based on the « Foreach » command and we will delete logs that are older than 30 days. To do this :
Open the scheduled task tool on your server.
In the top right corner, click on Create a basic task.

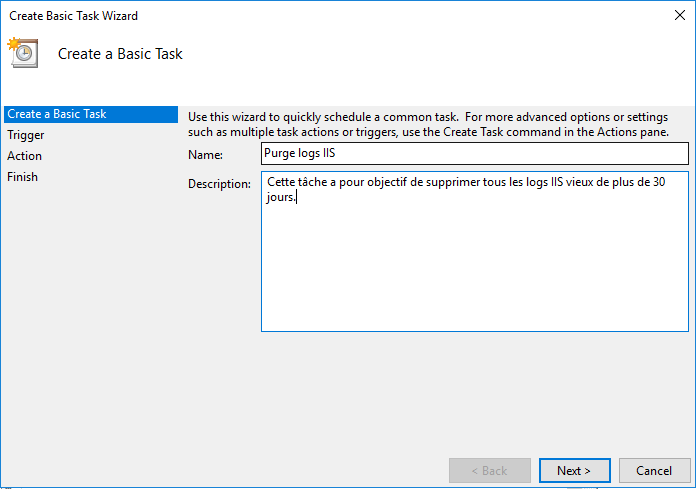
Give it a name (« Purge IIS logs ») and a description and click Next.
We choose to perform the purge once a week (weekly).
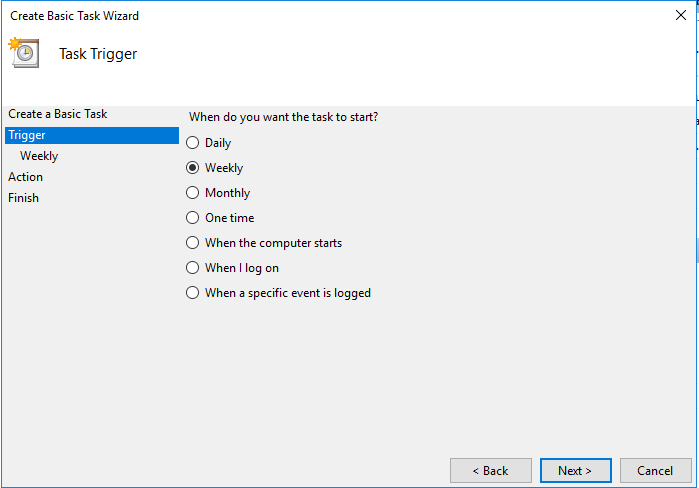
Then choose the day and time you want to run the task.

In the Action pane, leave default (Start a program).
Then enter one of the following commands:
- Forfiles.exe -p C:\inetpub\logs\LogFiles\W3SVC1 -m *.log -d -30 -c « Cmd.exe /C del @path\ » to delete only logs older than 30 days from the W3SVC1 folder.
- Forfiles.exe -p C:\inetpub\logs\LogFiles -m *.log -d -30 -c « Cmd.exe /C del @path\ » to delete all logs older than 30 days from the parent folder Logfiles.

In the pop-up that appears next, you are asked if you confirm that you want to use the Forfiles.exe program with the arguments indicated before. Click Yes.

The wizard is finished, it summarises the configuration. Click Finish to validate the creation.

Purging IIS logs with IIS Log Cleaner Tool
IIS Log cleaner tool is a third party tool. This tool automatically cleans the IIS log folder by removing log files older than the maximum age you set. The log files are moved to the recycle bin to avoid potential data loss. Although this tool is not officially supported by Microsoft, it works well and can be used to clean up log files. Note that it is mentioned in the Microsoft documentation.
Here are the steps to set up the IIS Log Cleaner Tool:
First of all, start by downloading the tool. You can find it here.
Then run it as an administrator from the server.
A window will indicate that this is the first time you are running the tool and will prompt you to check the default settings.

The tool is now in the notification area. Right click on it and select Settings. Click on OK.

This opens a settings file in a notepad. The text file includes a command to clean up the log files. You can change the maximum age to 30 days. The settings.txt file is stored in the same folder as IISLogCleaner.
Save the settings (if you have changed them) and right click on the IIS icon in the notification area. Click on Clean now and wait for the tool to clean up the log files.
The cleanup tool does not delete the files, it moves the log files to the recycle bin.
Purge IIS logs with a Configuration baseline
Creating the collection
Let’s start by creating a collection of all the machines that have the IIS role. We will call the collection « CB-IIS logs cleanup ». To populate this collection, use the following query:
select SMS_R_SYSTEM.ResourceID, SMS_R_SYSTEM.ResourceType, SMS_R_SYSTEM.Name, SMS_R_SYSTEM.SMSUniqueIdentifier, SMS_R_SYSTEM.ResourceDomainORWorkgroup, SMS_R_SYSTEM.Client from SMS_R_System inner join SMS_G_System_SERVICE on SMS_G_System_SERVICE.ResourceID = SMS_R_System.ResourceId where SMS_G_System_SERVICE.Name = "W3SVC"
Creating the Configuration Item
Once you have created your collection, go to Assets and Compliance, then pull down Compliance Settings and right click on Configuration Item. Select Create Configuration Item.

Give it a name (CI-IIS logs cleanup) and click Next.
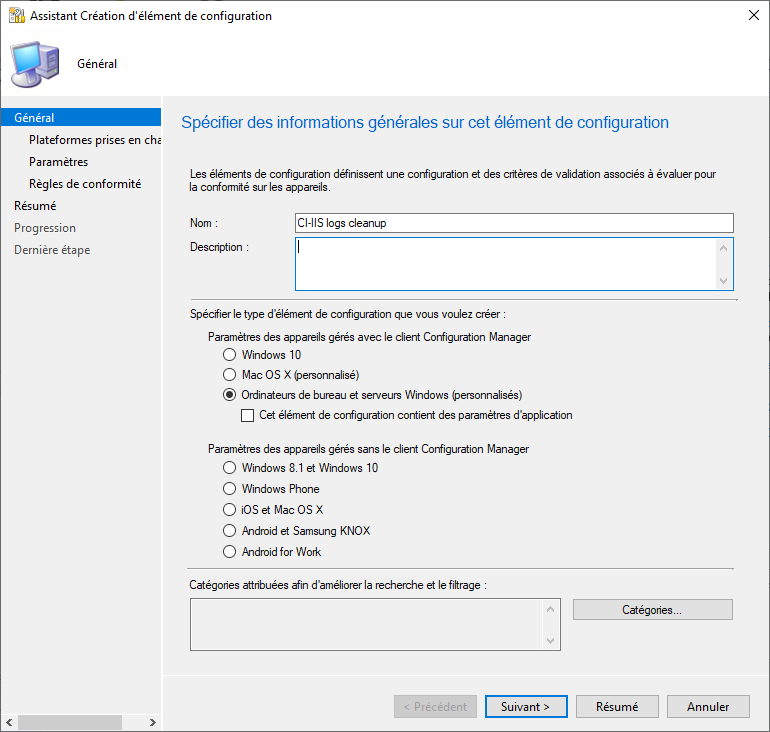
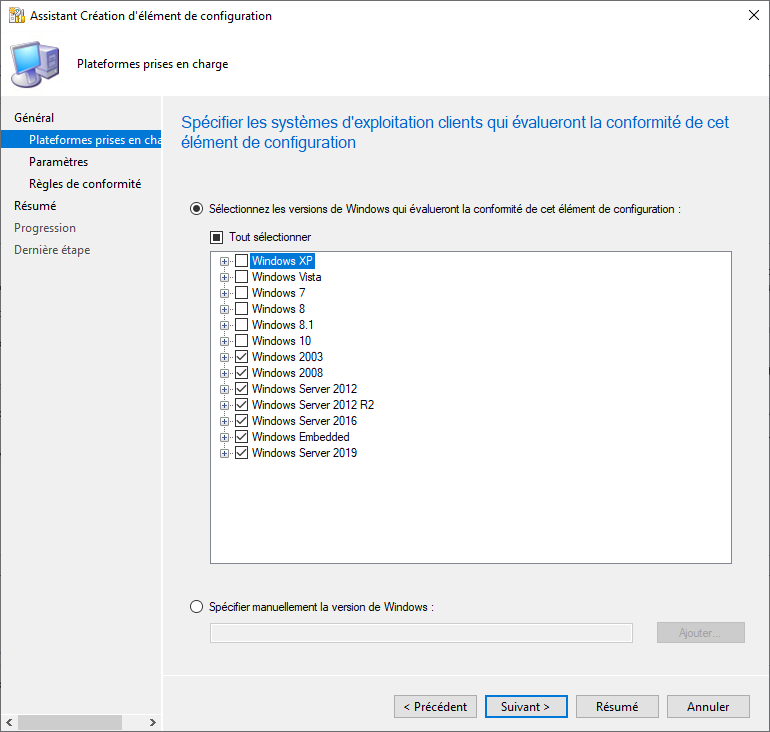
Then select on which systems the configuration item should be applied. We only want to apply it to servers, so uncheck the rest and click Next.
On the Settings tab, click New to create a compliance setting. In the new window, give it a name (IIS Log Purge) select Script as the parameter and String as the data type. Then click Add Script.

Copy the following script:
<br>$LogPath="C:\inetpub\logs\logfiles"<br>$Filter = "*.log" $LogAge = 30<br>$LogCount = (Get-Childitem -path:$LogPath -File -Filter:$Filter -Recurse | Where-Object {($_.LastWriteTime -lt (Get-Date).AddDays(-$LogAge))} | Measure-Object).Count<br>Write-Output $LogCount
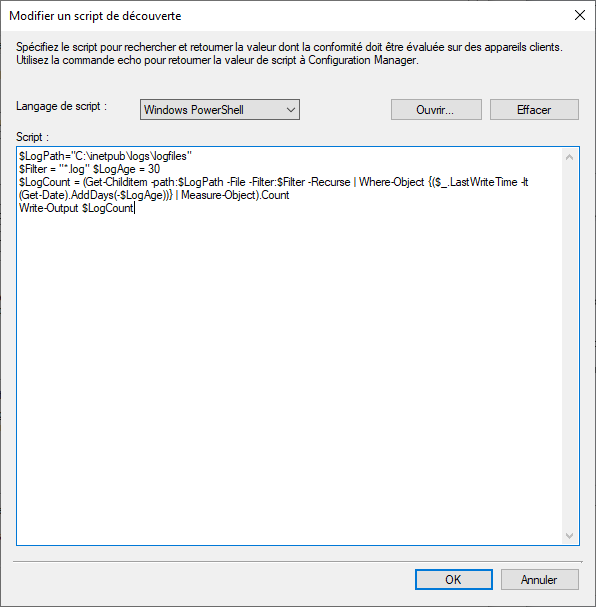
Of course you can change the $LogAge to whatever you like. Then click on OK.
In the « Remediation Script » section, click on Add Script. This is where the deletion of the logs will take place, thanks to the following script:
$LogPath="C:\inetpub\logs\logfiles"<br>$Filter = "*.log"
$LogAge = 30 Get-Childitem -Path:$LogPath -File -Filter:$Filter -Recurse | Where-Object {($_.LastWriteTime -lt (Get-Date).AddDays(-$LogAge))} | Remove-Item
Then click OK. Back in the Create Setting window, go to the Compliance Rules tab. Click New.
Add a name (IIS log purge over 30 days) and set the value to 0. Click OK to complete the rule. Click OK again. In the first window, click Next. You will now see the rule you have just created.

The summary is displayed, click Next until you close the wizard.
Creating the Configuration Baseline
Right-click Configuration Baselines and click Create Configuration Baseline.

Give it a name (CB-IIS logs cleanup), click Add and select Configuration Items.

Select the created configuration item and click Add. Click OK and then OK to complete the wizard.
Deploying the baseline configuration
Return to your collection, right click, select Deploy and then select Configuration Baseline. Add your baseline configuration. Check the ‘Resolve non-compliant rules when supported‘ and ‘Allow fixes outside the maintenance window‘ boxes. Specify the frequency of execution and click Finish.

How to disable IIS logs
If you have no interest in having IIS generate logs, you can simply disable them. Note however that some SCCM reports may be affected. To do this, simply
- Open IIS Manager
- On the left panel, choose your server
- On the main panel, double click on Logging
- On the right panel, click on Disable
Conclusion
We have seen in this article that there are several ways to purge the IIS log directory. You can even disable them completely if you don’t think they are necessary.

